BlueRetro Core Setup
This is a guide to setting up your BlueRetro Core device. BlueRetro is an adapter that allows you to connect BlueTooth controllers to older gaming systems. It involves two components: the ‘core’ chip and a console-specific adapter (e.g. for NES, PlayStation, etc.).
I had issues getting things set up and the instructions that came with the device and online were NOT clear. This guide outlines the steps I followed to get things set up.
Requirements
- BlueRetro Core
- Windows 10 PC
The Purchase
I’ve been wanting a wireless controller for my Nintendo 64 for a while. When I heard about BlueRetro, I was intrigued. When I saw it was only about $20 on aliexpress for the ‘core’ and the N64 adapter, I bought it.
Note: the BlueRetro website made it clear you need both the core and an adapter, but the ali express website only sold both (though this itself wasn’t 100% clear to me). But for about $20, you really do get the core and an adapter.
Then I waited a while for it to ship from China.
Unboxing
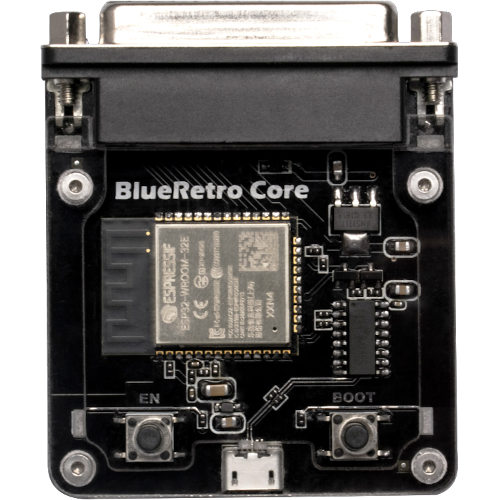
When you open the box, there are instructions wrapped around the ‘core’ module, but they are sparse and picture oriented with very few words. These are the written instructions in their entirety:
- Firmware update
- Connect cable
- Bluetooth pairing
And that is it. There is a QRCode to https://www.blue-retro.com/. https://www.blue-retro.com/support/ has some information, but it was not enough, hence this blog post.
Setup
You do need to do a firmware update. Importantly, you need to load firmware specifically for the console you are connecting to. If you don’t, my Nintendo 64 said something to the effect of “Controller Not Detected” when I connected everything right out of the box, though I could bluetooth connect my controller right away.
You might be able to bluetooth connect the core from your PC, but I didn’t try. This says the core device needs to be at firmware v0.19 or above - I’m not sure what it was on when I got it.
1. Connect the ‘Core’ to your PC
Use the included USB cable to connect the core device to your PC. Make sure the console adapter is NOT connected. Note: the device will appear as a virtual serial port device.
2. Download the Firmware Image
You get the firmware images themselves from https://darthcloud.itch.io/blueretro. Once there, click the ‘Download Now’ button. You’ll need to click through some prompts to pay or just click “No thanks, just take me to the downloads”.
You’ll then be offered a few different download options.
There are different versions and “HW1” and “HW2” to choose from.
Choose the highest version with “HW1”.
For me, it was “v1.8.4_hw1.zip” at 8 MB.
Inside the .zip you download, there is this file structure:
- bootoader
- bootloader.bin
- partition_table
- partition_table.bin
- BlueRetro_3do.bin
- BlueRetro_cdi.bin
- …
- BlueRetro_wii_extension.bin
You’ll need bootloader.bin, partition_table.bin and another .bin file corresponding to your adapter.
3. Download the Flashing Application
To download/flash these firmware files to your ‘core’ device (specifically the chip on the device), you’ll need a special program. Get it from https://www.espressif.com/en/support/download/other-tools.
Download Flash Download Tools - Windows PC V3.9.5 2023.06.12 or similar.
Inside that .zip file, extract flash_download_tool_3.9.5.exe (or whatever version they have now).
You will run it in the next step.
4. Download (Flash) the Firmware
These steps are from https://github.com/darthcloud/BlueRetro/wiki/Flashing-firmware-Windows-10, you may want to follow them (they’ve got pictures).
-
Run
flash_download_tool_*.exe -
On the first page:
- Select “ESP32” ChipType
- Select “Develop” WorkMode
-
On the second page, set up the first 3 rows of the table as follows (selecting your adapters for the third row):
√ bootloader.bin 0x1000 √ partition-table.bin 0x8000 √ BlueRetro_n64.bin 0x10000 -
Still on the second page:
- Set “SPI SPEED” to
40MHz - Set “SPI Mode” to
DIO - Select your COM Port (probably the highest if there are multiple)
- Set “Baud” to
921600, but I used460800
- Set “SPI SPEED” to
-
Click
START -
Wait between 13 and 28 minutes (maybe faster if you choose the higher Baud rate)
That is it, everything should work now.
5. Using it
Everything above was “1. Firmware update” from the box instructions. These are “2. Connect cable” and “3. Bluetooth pairing”. They assume you are connecting to a N64 console and want to use a Switch Pro Controller.
- Unplug the ‘core’ from your PC and plug it into your console with the adapter.
- Turn on the console - you should see the blue light blinking slowly
- Pair your controller, I hold down the ‘sync’ button at the top the Switch Pro Controller - it should sync in a few seconds
And everything should work now and you can play your legacy console with a bluetooth controller.